Hello friends!
I recently posted on my Instragram Story (@toriswholelife) if people wanted to see some of my DIY wedding things. My wedding is set for October of this year, and I have been doing most of the things myself. It has been quite the adventure, but I thought it would be helpful to share my ideas, creations, and inspirations for you. I will also include some tips and tricks at the end of the blog post! So here we go...
First off, I have included some pictures of my original inspiration before I even started planning. These pins are also on my Pinterest Board:
Okay, now that you have looked at some inspo... here are my creations!
Our Save the Dates-
Our photographer took engagement photos for us. I added the text to a photo using an app on my phone. I then added this photo to the Shutterfly app. You can get unlimited free prints using the Shutterfly app, you just pay for shipping. I bought envelopes from Target & got some stamps from the UPSP. This was a simple and cheap DIY Save the Date.
This cute sign was made by
Maddie Butterfiled. I purchased the sign from her for $30 and I bought the greenery around it at Hobby Lobby for 50% off bringing it to $10.
These cute little boutonnieres were so quick and easy to make. I made 12 of these: 7 for groomsmen, 1 for groom, 2 for fathers, 2 for ushers. I bought one bunch of greenery (the small little leaves) that had the white balls on it. This was about $7 at Michael's. I also purchased the twine & pins at Michael's for under $10. I purchased one bunch of white flowers for around $5-$7. I arranged the flowers how I wanted them and then wrapped the twine around the "stem" part. I hot glued the twin on the back so that it would all stay together.
The mom's corsages turned out beautiful! I bough 2 metal bracelets like this:
from Michael's. I bought one silver and one gold. I used a round piece of cardboard and started hot gluing the flowers to the cardboard. I cut the stems up as close as I could to the flowers. I just kept adding greenery until the corsage looked full. I used super glue to glue the card board to the metal. All together, these costs less than $20 to make. The key is to look for fake flowers that are on sale (or use the coupons Michaels and Hobby Lobby always have- yes, you may have to go more than once to save some money on flowers).

Next are the bridesmaids and maid of honor bouquets. I found pre-made bouquets on sale at Michael for $10 a piece. They were originally $20. I bought some greenery to add to the already made bouquet so it would match my wedding colors. Next, I used the green floral tape to wrap the stem. I bought white ribbon and wrapped over the green floral tape. Then I secured it with the same pins as the guy's flowers. I made sure to hot glue the ribbon and pin so that everything stayed together. These costs around $80-90 to make 8 bouquets.

Now for my bridal bouquet. This one was a little more challenging for me. I knew it had to be bigger than the bridesmaids' and I also wanted it to stand out and tie in the bridesmaids' dresses. I used the same greenery as I did for the other bouquets. I bought a batch of white roses (keep in mind, all the flowers I made for my wedding are all fake), a batch of burgundy little flowers, and a bunch of white/green flowers. I started putting everything together and rearranging the flowers. I wrapped the stem just like the bridesmaids bouquets, but for mine I added more pins so that it looks like this:
(not my picture, this one is from google)
All together, my bridal bouquet was around $40-60 to make.
Next is my fiance's ring. I wanted something unique and different. We both love being outdoors, so when I came across
Manly Bands I knew I had to get his ring from there. I bought him the Elk Ring which is compromised of wood and antler. The shipping was so fast and they have free 30 day returns, which is good in case the ring is not the right size.
Next, the parents' wedding gift. I wanted to hand make the gifts so that they would be special. There is just something about handmade gifts that makes things more personalized and more meaningful. I found my inspiration for this sign on Etsy. I bought the board for 40% off at Hobby Lobby with their coupon. I used Adobe Illustrator to print the text out. Then, I used a
transfer method to trace the letters onto the board with pencil. I used black paint to paint the board with a tiny paint brush. I hot glued a clip to the board so that we can attach a wedding picture for our parents. I also purchased the clips from Hobby Lobby.
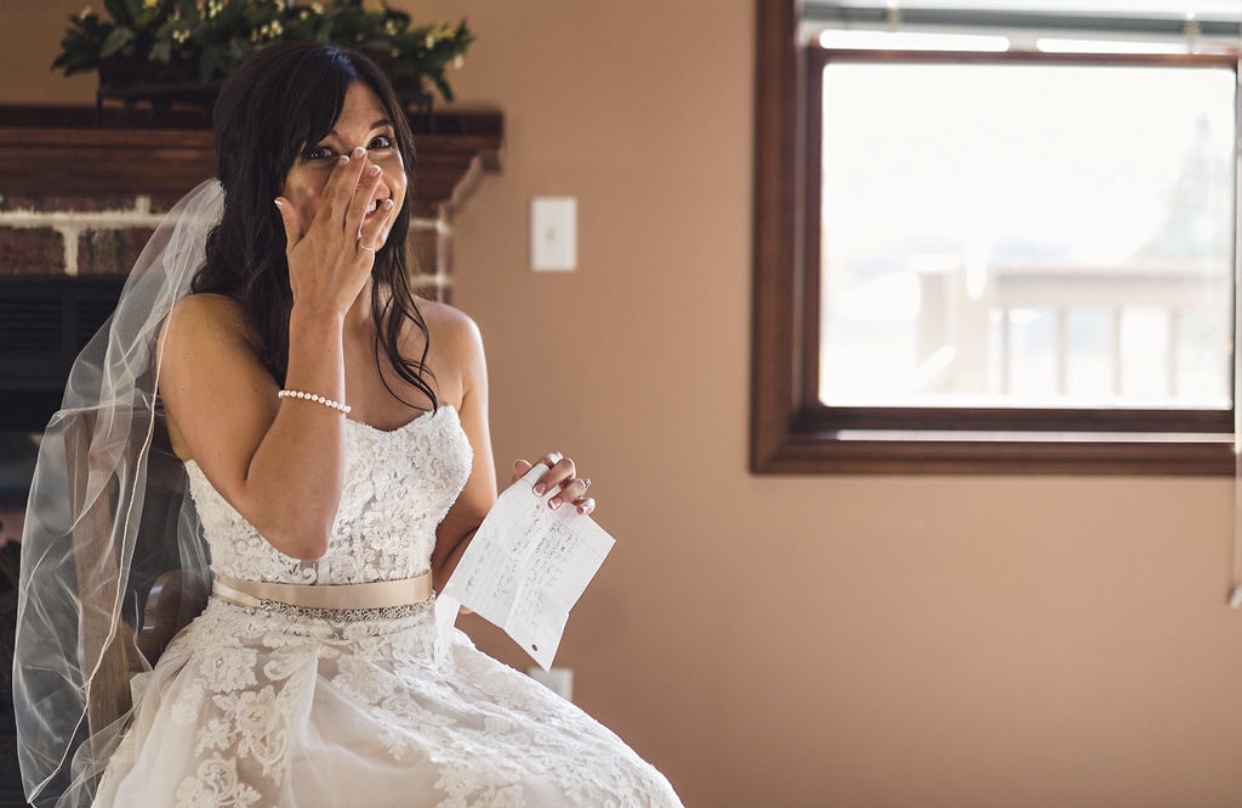
Here is the updated picture. We grabbed some of our parents' wedding pictures (secretly so it would be a surprise) and had our photographer snap a picture of us hold our parents' wedding pictures. They turned out adorable and our parents loved the personal touch on the gift.
This sign has nothing to do with my wedding, but this year I have been hand making signs for all of our friends and family who get married. How cute and personalized are these? I used the same transfer methods as above.
I painted this sign for a friend's wedding ceremony.
I painted these hangers for my wedding party: bride, matron of honor, maid of honor, 5 bridesmaids, & 2 flower girls. I purchased these white hangers from Amazon:
White Wood Hangers. My tip before writing or painting on them, spray a light coat of white chalk paint onto each hanger. The gloss on the hangers makes painting a little difficult because it is too smooth.
Groomsmen Gifts
We saw a bunch of Etched Groomsmen Glasses on Etsy. My fiance was planning on buying some off there, but then I mentioned we should try to make them ourselves... so of course we did!
You can find these HUGE glass mugs at a lot of different places. Amazon sells them in boxes, Walmart sells them, and even Dollar Tree sells them for $1.
You will need these things to make the mugs:
glass mugs
sticker letters
rubbing alcohol
gloves
old paint brush
glass etching cream
*the stickers are from Hobby Lobby and they were discounted to $2. The etching cream is from
Amazon and it is $10*
The first thing you want to do is clean the area you want to etch with rubbing alcohol. Then stick the stickers on the mugs. We did each groomsmen's initials. Next you want to place the etching cream in the area in nice even, thick coat.
Allow the etching cream to sit on the mugs for 25-30 minutes. Also, about half way through the time, you want to dab the etching cream all so that you make sure you get every part of the glass covered.
Once the time is up, scoop most of the etching cream back into the jar. You can reuse it! Then, wash the etching cream off the glasses in a downward motion. I found it easiest to use my paint brush to brush the etching cream off the glass using the water. (You may want to use gloves while handling the etching cream because the chemicals are dangerous and can be harmful to the skin).
Once all of the etching cream is off, you can peel the stickers off and wash the mugs. They are dishwasher safe!
If we would have bought the mugs on Etsy, they would cost $12 each. For 9 mugs that is $108 plus $27 for shipping. The total would have been close to $140.
Doing the DIY version, the total came to around $30. What a steal! I think ours look cooler too!
Wedding Shoes
Here are the wedding shoes I purchased from Lulus for like 50-70% off and free shipping. They only cost $20.
I got my wedding dress from David's Bridal and I will upload pictures of that once the wedding is over.
Other things
These were so much cheaper! We purchased between 40-50 table cloths for about $230
3. I purchased the brown paper for our wedding invitations from Michael's and I used the 40% off coupon each time I bought a package of paper. Here is the paper I used:
Brown Card Stock. We took the template and the paper to a local print shop (if you are in Columbia City, Indiana we used Espich Printing) and they printed and cut all of the invitations for $64.
4. I purchased the burgundy envelopes from Cards and Pockets:
Large Envelopes and
RSVP Envelopes. You can also purchase samples of the envelopes to make sure the size and color are right for you. I did this and the samples came so fast!
5. We made our guest list using a google drive document. We listed the guest's name, address, and number of people and made 3 separate columns for bride's family, grooms family, & friends. We are inviting 350 guests, so this made it easier for us to track. I also put a number beside each guest that I also included on the outside of the RSVP card so that the RSVPs are quicker and easier to track when they start coming back to us.
6. We used our excel guest list from our google drive to create labels for our envelopes. My fiance worked some magic and he can quickly download our excel guest list into the label template. When you are printing the labels, remember you will need 2 Guest Addresses (one for the invite envelope & one for the RSVP envelope) and 2 of your own address labels (one for the invite envelope and one for the RSVP envelope). You will also need double the stamps. For example, if you are mailing 175 invites, you will need 350 stamps (one stamp for the invite envelope & one stamp for the RSVP envelope).
7. Our photographer is a friend from High School. If you are in the Indianapolis or Fort Wayne area, his name is
Nick Ewing and he does both photography and videography. We were able to get a really good price on his photography since he was just starting to build up his photography business. We got our engagement session and all day wedding photography (plus a canvas print after the wedding) for $1500. Nick is very knowledgeable in the layout of the wedding day and what photos to capture.
8. The DJ- We were able to find a great DJ who is going to do our outdoor music for the ceremony as well as the music for the reception from 4pm-11pm for $990. His name is Denny Cook and he is the owner of
Fort Wayne Pro DJs. Denny was very friendly during our first phone conversation. Since he has DJ many weddings, he is knowledgeable in the wedding day timeline. This was so helpful to me since I am doing all of the wedding planning myself. He also has many fun games planned for our reception.
9. BBQ- We are having
Blue Stack Smokehouse cater our reception. They have been so kind and willing to work with us. We are having Pulled Pork and sides for about $1400 for 300ish people. They will deliver the food and also bring plates, silverware, and napkins.
10. The ceremony is going to be held at a local park from our hometown. There is no cost to have our wedding there, but we do have to rent chairs. The important thing for us was to have the chairs delivered, set up, and taken down. We ended up going with
Ace Tent Rental in Fort Wayne. The cost for 320 black chairs with delivery and set up is $552.
11. Wedding Cake- I am lactose intolerant, so I wanted a cake that I could eat without having an upset stomach. That's where
Sea Salt and Cinnamon comes in! They are a vegan bakery. I am having a 3 tier personal cake for my fiance and I and they are creating this masterpiece for $40. The owners of this local Muncie, IN bakery are amazing humans. I love their story and their dedication to creating the perfect baked goods.
12. DONUTS! One of my favorite words. I knew I wanted to have donuts at our wedding reception instead of cake because donuts are just so fun! I called many places to get pricing, and we are going with Kroger Donuts. They charge 6.99 per dozen.
13. Things to not forget- Passport! If you are going on a honeymoon overseas, you will want to get your passport. I just sent my documents into get processed. Remember that this can take a while, so make sure you complete it well in advanced. Also, if you get the passport make sure it is in your maiden name (along with your airplane tickets). Once you get back from your honeymoon, you can send in your documentation for a new passport. You can find that document here:
Passport Name change (within 1 year of getting your passport).
14. Centerpieces- If you saw my inspiration above, I made basically the same thing. I made my centerpieces by using old mason jars, wine bottles, beer bottles, kombucha bottles, etc. I also purchased a few glass bottles from Dollar Tree once I got tired of taking labels off all of the bottles. I soaked the bottles in water for a day to make the labels easier to peel off & used Goo Gone to help get the rest of the labels off. Next, I washed the bottles with soap and water. Let them dry! Then I used Chalk Spray Paint with a stake in the ground to spray each bottle. Here is the paint I used:
Then I bought bunches of greenery from Hobby Lobby-Eucalyptus Bush Sku: 1599760 $6.99. I bought all the flowers and greenery when they were 50% off.
I can't wait to upload some pictures of the big day! I also have some other things I will add to this post once the wedding is over, but for now they have to stay a surprise :)
Wedding pictures updates-
Later Taters
"It's a beautiful day, don't let it get away."